I have screwed up so royally that, even though the handle is ON, you can still see the screws...I would post the picture so you can see what I mean, but I am too ashamed.
I even bought one of those handy dandy guides that they sell in hardware stores, but those only work if you want to install within an inch of the top of the drawer, or if you have magical powers. I wanted drawer pulls installed just above center horizontally - and I am no magician.
I needed a solution before attempting to install my next drawer pull. So, here it is. An easily customizable guide you can make yourself! No more screws showing! No more eye rolls from my husband!
Supplies you will need:
Clear "Cut Your Own Stencils" sheets (I purchased at Michaels, the brand is "Plaid")
Self Healing Cutting Mat
Carpenters Square
Tape
Sharpie
Drawer Pull
Hammer
Scrap Block
Xacto Blade or other cutting blade
Large Nail
Pencil
Drill Guide (totally optional)
Step One
Cut a piece of the stencil for your guide. Carefully align the stencil on top of the lines on the cutting mat. You want a straight and square piece so it is easy to line up later. Tape the stencil sheet to the cutting mat so it won't shift around and go out of alignment. And, if you are like me and not sure of how steady you can hold the straight edge while using a sharp knife - go ahead and tape the straight edge down, too!
Step Two
Take the piece of stencil you just cut and line it up on your cutting mat, again keeping it straight on the lines. Then place your drawer pull on top of it using the guide lines. This way the handle is straight in line with the edge of the stencil sheet.
Then tape the the handle down, keeping it straight...
Step 3
Pick it up, flip it over and use your Sharpie to mark the hole locations.
Step Four
Remove the handle and put the stencil on top of your scrap wood block. The drive the nail through the holes you marked with a hammer.
Now you have a stencil sheet with holes right where your drawer pull holes are! But we aren't quite done yet. Your stencil now has little protrusions in the back where the nail exited. Get rid of those so your stencil will lay flat when you put it on the drawer. I used my knife to shave the protrusions right off. Careful to not rip bigger holes!
Step Six
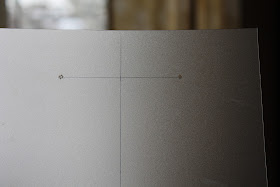
You want to add a cross to your stencil. These lines will help you line up your stencil on any drawer front, no matter what size it is! Make sure the lines are PERFECTLY straight. Crooked lines will = crooked drawer pull!
Double check they are perfectly straight by using your square on every edge and at the intersection where the lines meet...
You can now go to your drawer front. Use a pencil and make a vertical line at the center of the drawer. Then choose the level on the horizontal where you want your drawer pull to be. Draw a perfectly straight line horizontally on your drawer at that level. So, now you should have a cross on your drawer. Then put the cross on the stencil on top of the cross on your drawer.
This handy device keeps your drill bit perfectly straight while you drill your hole. Because, nothing would suck more than doing all of this work only to hold your drill at an angle and have your dang screws showing after you install your drawer pull!
How did this work out for you??


No comments:
Post a Comment